DIY Picture frame molding

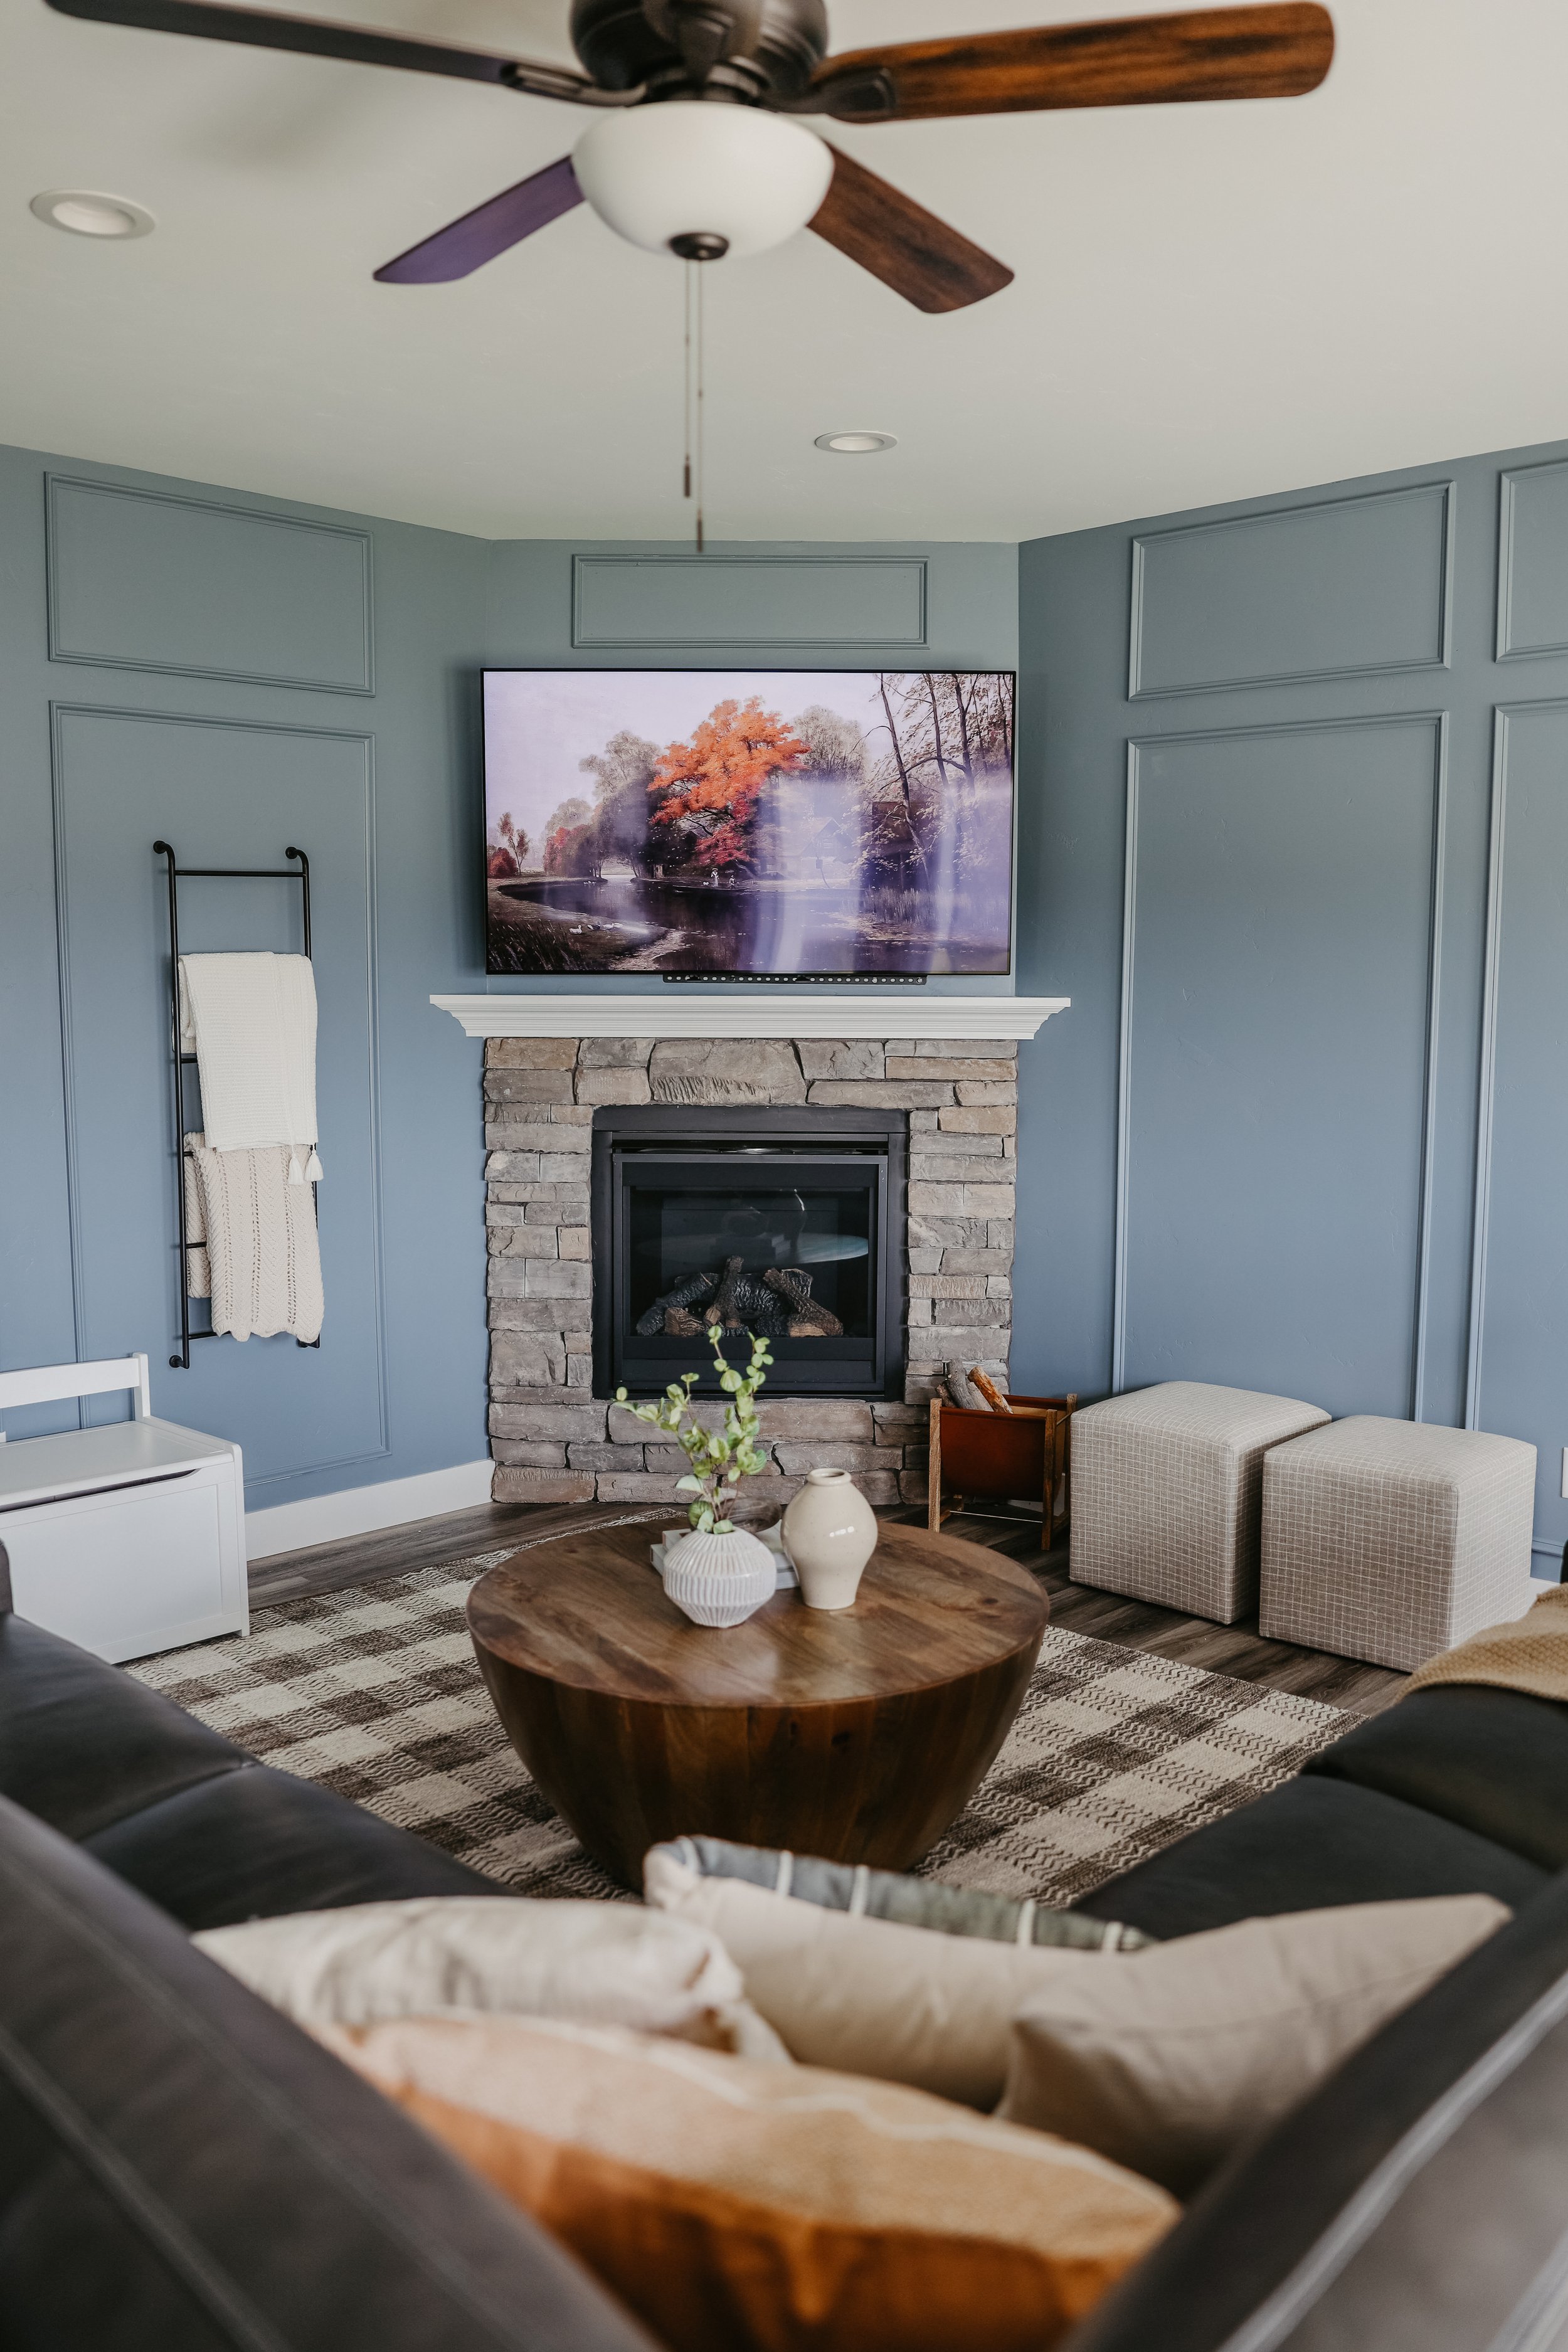
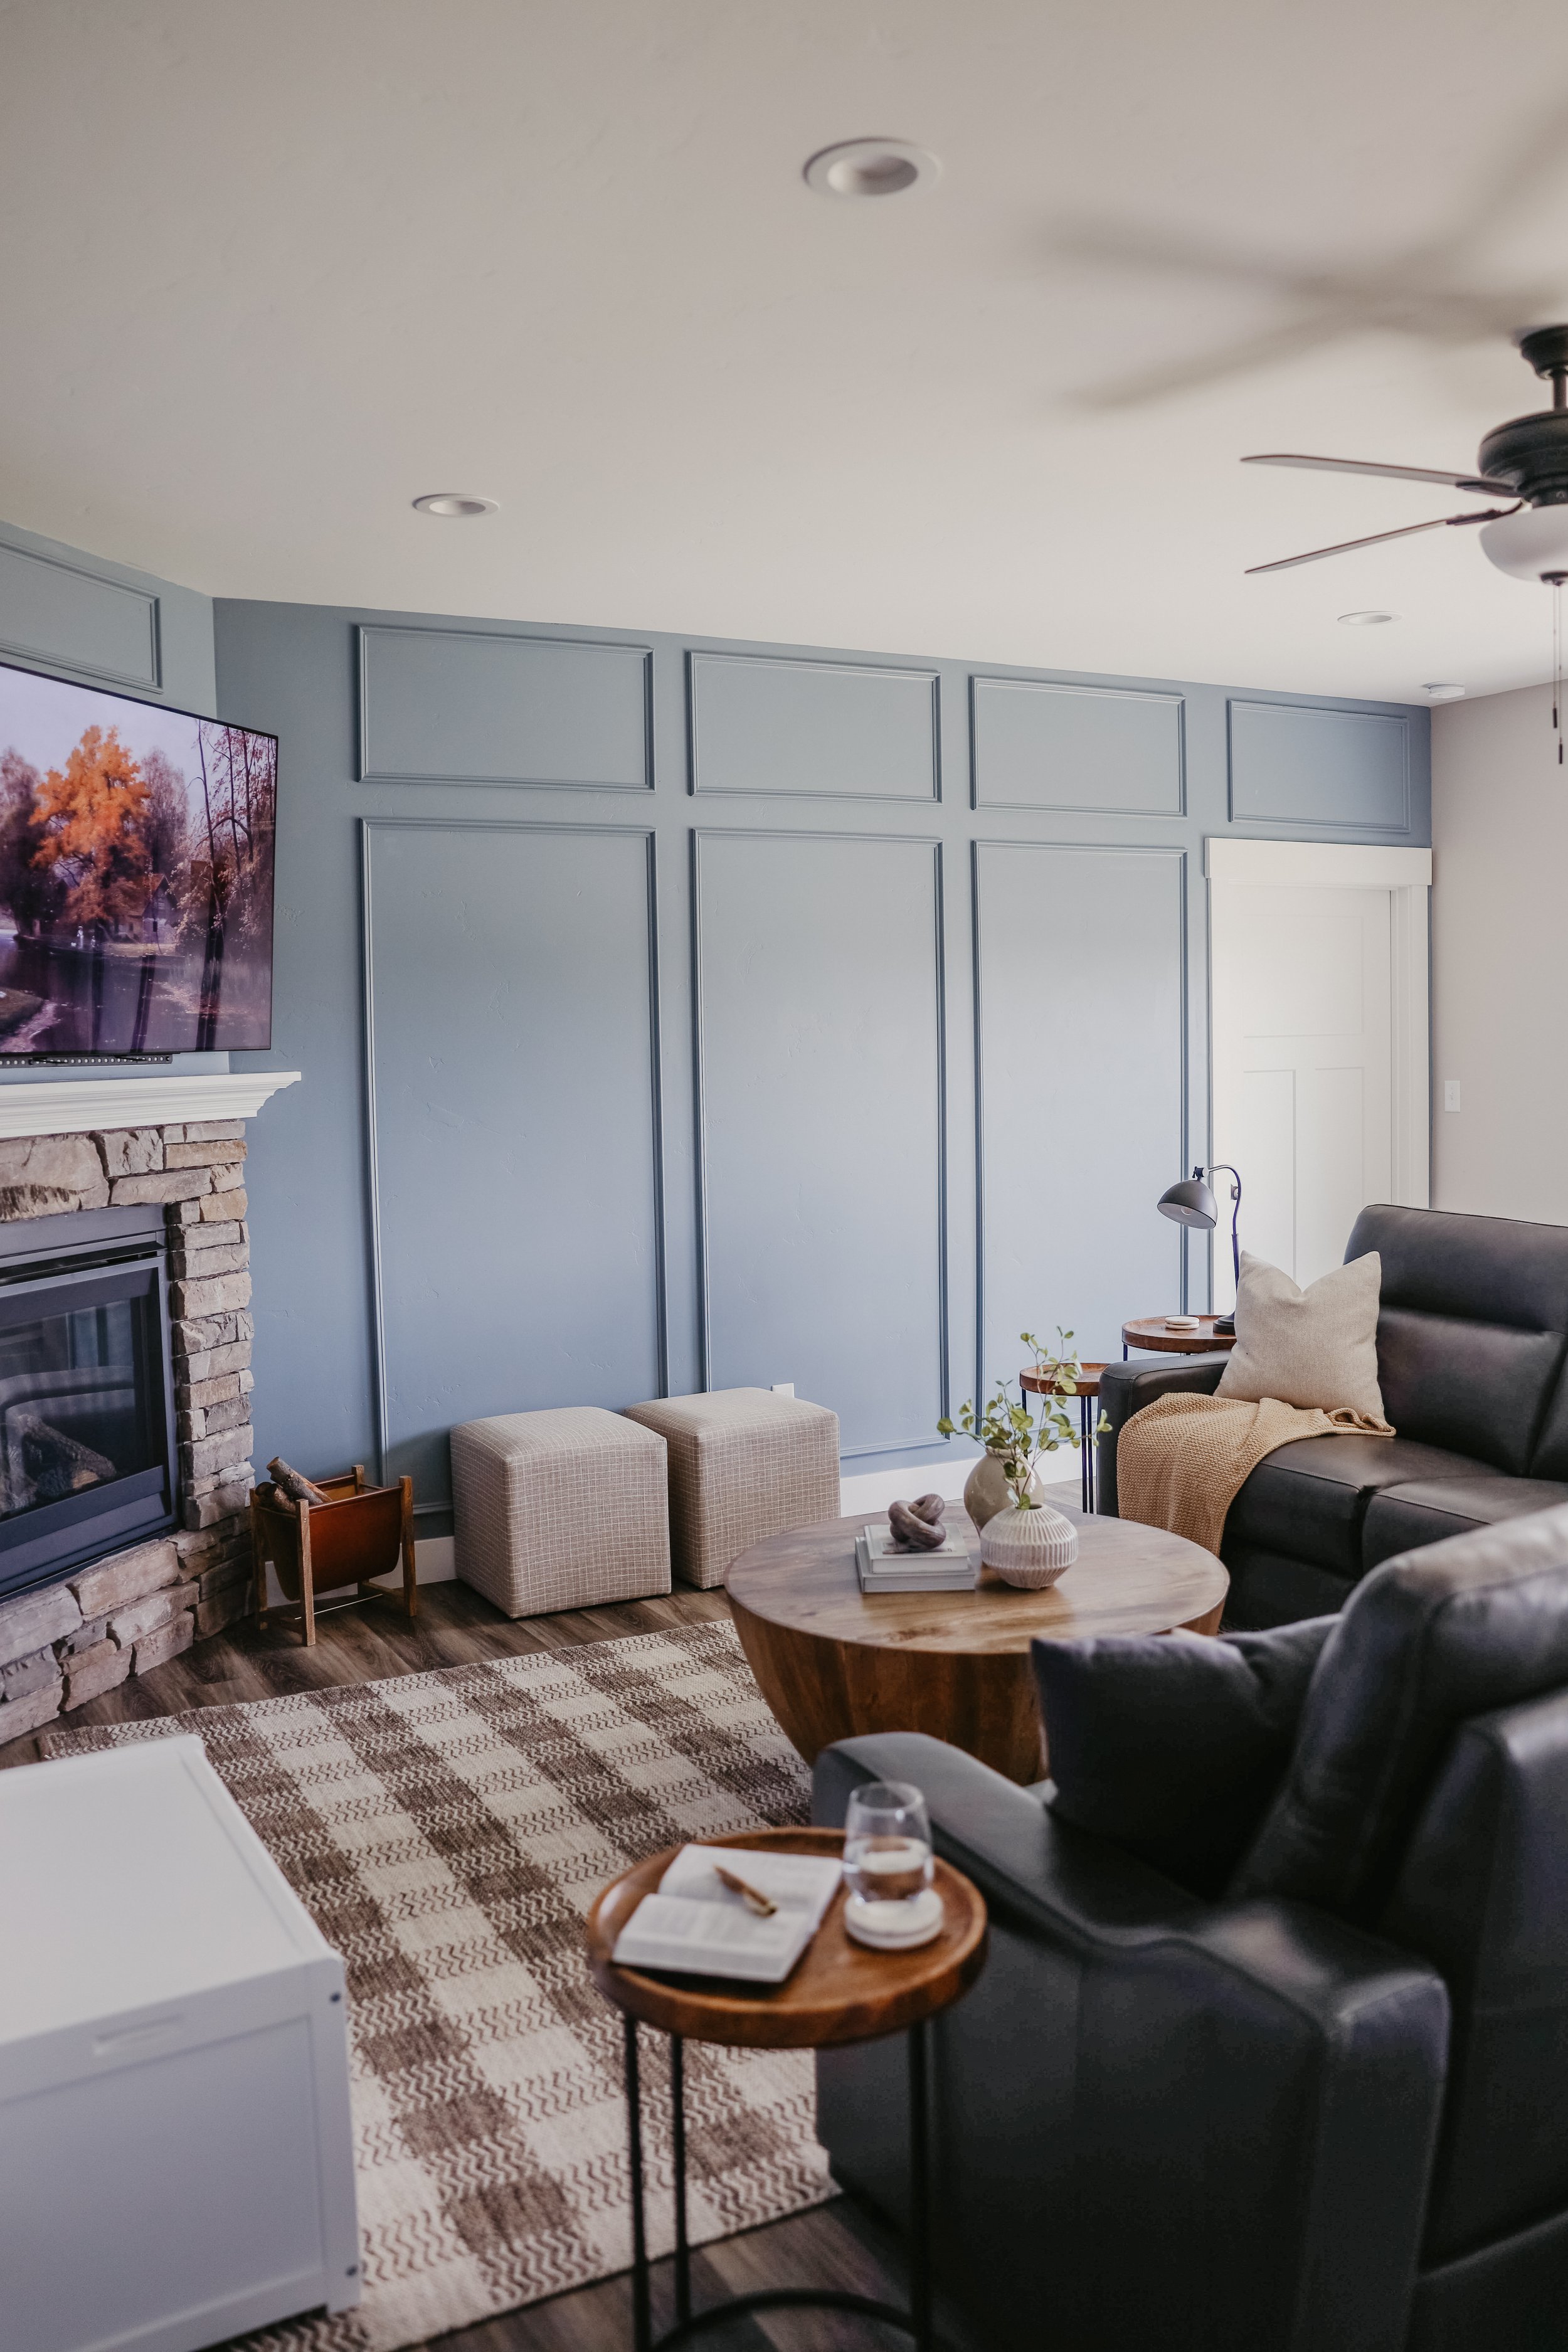
one of the easiest wall treatments you can add to any space is picture frame molding, box molding, picture frame boxes, whatever you wanna call it. My parents were looking for some character in their open concept living room; a way to define the space a little better. so we settled on this! and i love how it came out.
we started by taping out all the boxes so we could get the spacing down and also know how much pvc trim we would need. then i painted all the walls the color the trim would be so i didn’t have to try and paint in and around all the boxes later. the color is really pretty in person, the perfect light slate blue color. i don’t usually use color much (other than green haha) in my own house, but sometimes you give the client what they want ;)

next up, we started with the molding! I used only my miter saw and brad nailer for this project. I first measured how big each box was going to be, then i cut the pieces to length. then I mitered the corners at a 45 degree angle in the direction they needed to go to make a frame. it helped me to lay the pieces out before i mitered them, and then make a mark on the corner i needed to cut. i only cut one box at a time, then i nailed it up and made sure my spacing was consistent. then i repeated these steps until i completed all the boxes we wanted. if you were doing this without having little kids, you could definitely knock this out in a few hours. but i do have little kids and this took me a few weeks during naptime to get over to their house and work on it.
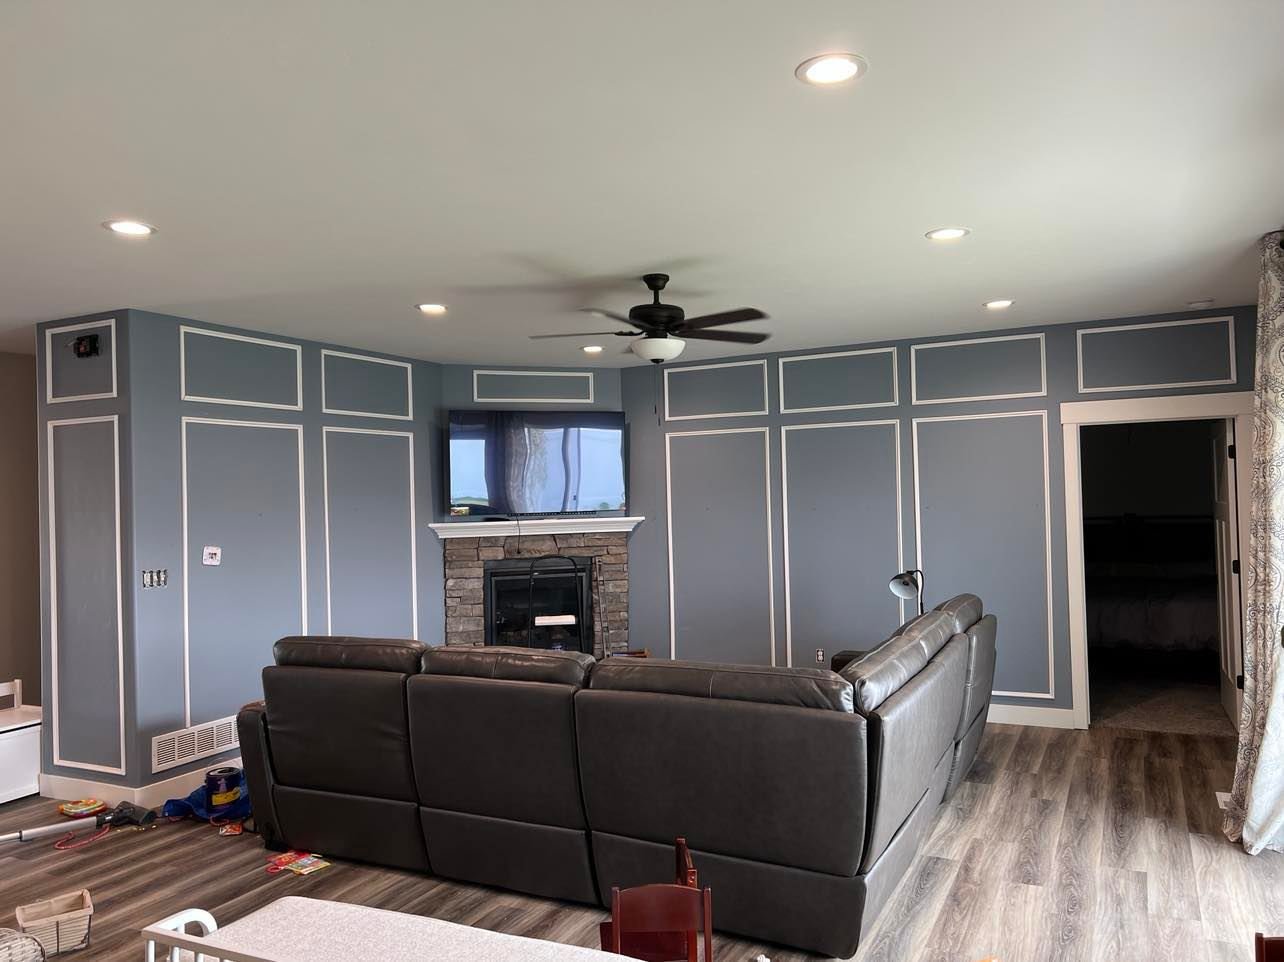
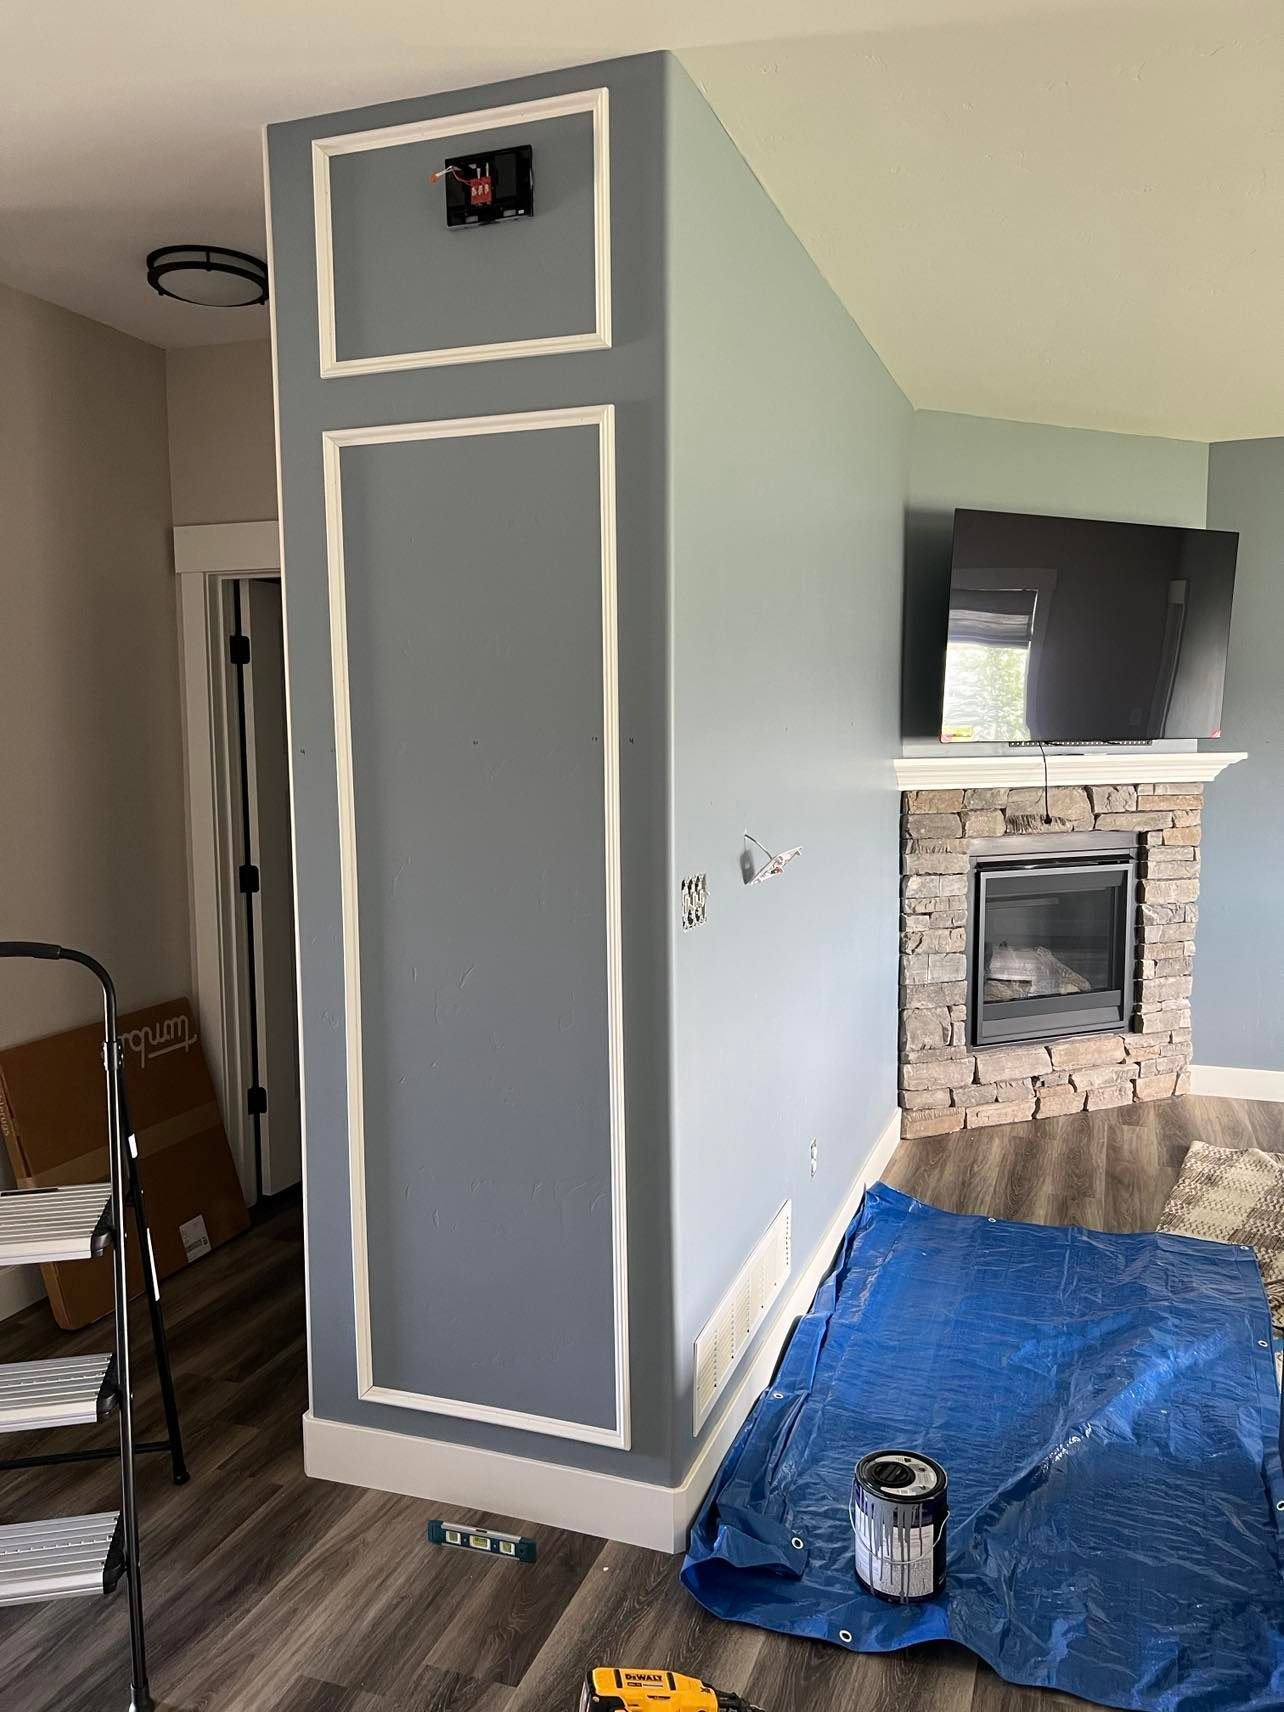
then, i went to wood filling all the nail holes + caulked the seam around each piece of trim. it isn’t required, but it really makes your finished product look more professional. kind of like baking a cake. you wouldn’t make a birthday cake and sell it without the fancy frosting right? after i completed all the finish work, it was time to paint the trim! I used my favorite 2’ angled brush and did two coats. then we cleaned it all up + added the decor! I love how this came out and it really makes SUCH A DIFFERENCE in the feel of the home. the living room feels more like its own room now even though it’s all open. this is a great beginner project for anyone wanting to try!
supplies:-miter saw
-brad nailer
paint color:-Teton Blue by Behr